How To Set Up A Static IP Address
Welcome to our guide on how to set up a static IP address for a consistent network configuration. In this section, we will take you through the step-by-step process, ensuring a secure connection for your network. Whether you’re a Windows or Mac user, we’ve got you covered with specific instructions for each operating system version. So let’s get started and make sure you have a reliable and secure network with a static IP address setup.
Understanding Static IP Addresses
Before you begin the setup process, it is important to understand what a static IP address is and how it differs from a dynamic IP address. Gain a clear understanding of static IP addresses and their benefits.
A static IP address is a fixed address assigned to a device on a network. Unlike dynamic IP addresses, which are automatically assigned by DHCP servers and can change over time, a static IP address remains constant. This means that whenever you connect to the network, your device will always have the same IP address.
The main benefit of using a static IP address is that it allows for easier access to network resources and services. With a static IP address, you can easily configure port forwarding, remote access, and networked devices that require a fixed IP address to function properly. It also simplifies the process of setting up virtual private networks (VPNs) and hosting servers.
Another advantage of a static IP address is improved security. Since the IP address remains the same, it is easier to set up firewall rules and access controls to allow or deny specific IP addresses. This helps protect your network from unauthorized access and potential security breaches.
Furthermore, a static IP address can enhance network performance by reducing connection issues and improving network speeds. Since the IP address is constant, there is no need for the device to request a new IP address each time it connects to the network. This can lead to more reliable and efficient network communication.
Overall, understanding static IP addresses is essential before proceeding with the setup process. It allows you to make an informed decision about whether a static IP address is the right choice for your network configuration needs.
Checking Network Compatibility
Before setting up a static IP address, it is crucial to ensure that your network equipment and devices are compatible with this type of addressing. By checking network compatibility, you can determine if your network supports the assignment of static IP addresses.
To check compatibility and make any necessary adjustments, follow the steps below:
- Access your router’s configuration settings by entering the router’s IP address into your web browser. Typically, the router’s IP address is 192.168.0.1 or 192.168.1.1. However, you can find the specific IP address in the router’s manual or by searching online for your router model.
- Once you have accessed the router’s configuration settings, navigate to the network settings or LAN settings section.
- Look for the DHCP (Dynamic Host Configuration Protocol) settings. DHCP is responsible for automatically assigning IP addresses to devices on your network. If DHCP is enabled and assigning dynamic IP addresses, you may need to disable it to assign a static IP address.
- If DHCP is enabled, locate the option to configure a static IP address. This option may be labelled as “Static IP,” “Fixed IP,” or “Manual IP.” Enable this option to assign a static IP address to your device.
- Save the changes and exit the router’s configuration settings. Your network is now ready to assign static IP addresses.
By verifying network compatibility and making the necessary adjustments, you can proceed with confidence to the next steps of setting up a fixed IP address.
Obtaining Network Information
Setting up a static IP address requires gathering specific network information. By following the steps outlined in this section, you will obtain crucial details such as the IP address, subnet mask, gateway, and DNS server information. This information is essential for configuring your static IP address correctly.
Gathering IP Address Information:
The first piece of information you need is the IP address for your device. To find this information:
- On Windows: Open the Command Prompt and type ‘ipconfig’ to display your IP address.
- On Mac: Go to the Apple menu, select System Preferences, click on Network, and find your IP address under the Status section.
Determining Subnet Mask and Gateway:
The subnet mask and gateway are necessary for routing network traffic. Follow these steps to locate these details:
- On Windows: In the Command Prompt, type ‘ipconfig/all’ to identify the subnet mask and gateway.
- On Mac: In the Network section of System Preferences, click on Advanced and select the TCP/IP tab to find the subnet mask and router information.
Identifying DNS Server Information:
The DNS (Domain Name System) server converts domain names into IP addresses. Obtain the DNS server information using the following steps:
- On Windows: In the Command Prompt, type ‘ipconfig/all’ and locate the DNS server details.
- On Mac: In the Network section of System Preferences, click on Advanced, select the DNS tab, and note the DNS server IP addresses listed.
With this network information in hand, you are now ready to proceed with configuring your static IP address. The next section will provide detailed instructions tailored to your operating system, whether you are using Windows or macOS.
Configuring Static IP on Windows
Setting up a fixed IP address on your Windows operating system is a straightforward process. Whether you’re using Windows 10, 8, or 7, follow our step-by-step instructions below to configure a static IP.
Step 1: Access Network and Internet Settings
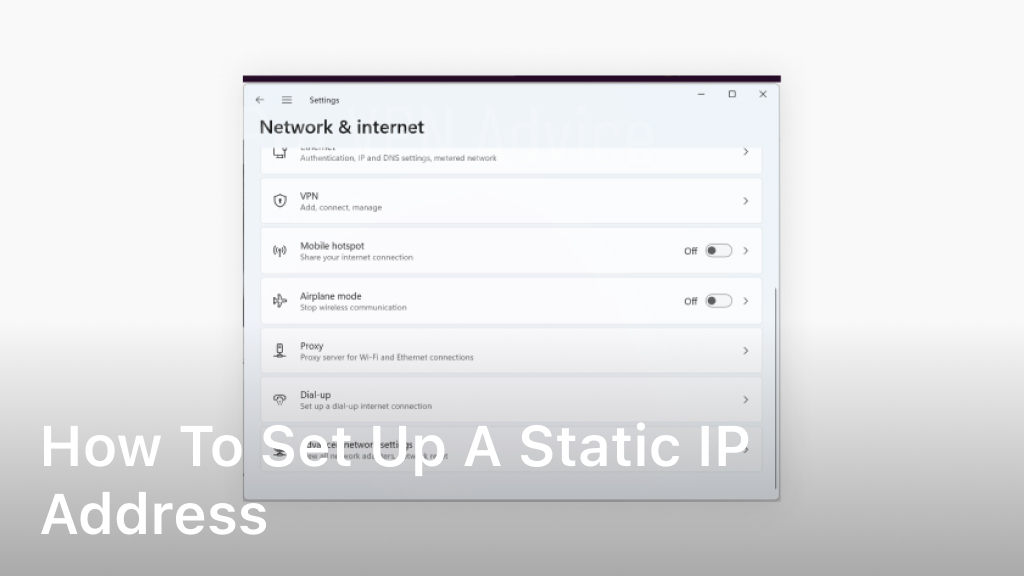
Open the Start menu and click on the Settings icon. From the Settings window, select “Network & Internet.”
Step 2: Go to Network Settings
In the Network & Internet window, click on “Network and Sharing Center” to access the network settings.
Step 3: Open Network Connections
In the Network and Sharing Center, click on “Change adapter settings” in the left-hand sidebar. This will open the Network Connections window.
Step 4: Select Network Adapter
In the Network Connections window, locate the network adapter that you want to configure a static IP for. Right-click on the adapter and select “Properties” from the context menu.
Step 5: Access IPv4 Properties
In the adapter Properties window, scroll down and double-click on “Internet Protocol Version 4 (TCP/IPv4)” to access the IPv4 properties.
Step 6: Set Up Static IP
In the IPv4 properties window, select the “Use the following IP address” option. Enter the desired IP address, subnet mask, default gateway, and DNS server addresses provided by your network administrator or ISP.
Step 7: Apply and Save Changes
Once you have entered the static IP details, click on the “OK” button to save the changes. Afterward, close all windows, and your Windows operating system will now be configured with a static IP address.
By following these steps, you can easily set up a fixed IP on your Windows system, ensuring a consistent network configuration for enhanced security and stability.
Configuring Static IP on Mac
If you’re a Mac user, you can easily set up a fixed IP address on your macOS. Follow these simple steps based on your specific Mac version, including macOS Catalina, Mojave, High Sierra, and more.
Step 1: Open Network Preferences
Go to the Apple menu at the top left corner of your screen and select “System Preferences.” From there, click on the “Network” icon to open the Network Preferences window.
Step 2: Select your Network Connection
In the Network Preferences window, you’ll see a list of available network connections on the left-hand side. Choose the connection you want to configure the static IP address for.
Step 3: Click on the “Advanced” button
After selecting the network connection, click on the “Advanced” button located at the bottom right of the Network Preferences window.
Step 4: Navigate to the TCP/IP tab
In the Advanced window, you’ll see multiple tabs. Click on the “TCP/IP” tab to access the TCP/IP settings for the selected network connection.
Step 5: Configure the static IP address
On the TCP/IP tab, you’ll find a dropdown menu labeled “Configure IPv4.” Select the option “Manually” from the dropdown menu. This will allow you to manually enter the static IP address details.
- Enter the desired IP address, subnet mask, and router address in the respective fields.
- If required, enter the DNS server addresses in the relevant fields as well.
- Click on the “Apply” button to save the changes.
Step 6: Verify the static IP configuration
After applying the changes, close the Network Preferences window. To ensure that the static IP address has been successfully configured, you can go to the “Network” icon in the System Preferences again and check if the updated IP address is displayed next to your selected network connection.
That’s it! You have now successfully set up a fixed IP address on your Mac. Enjoy the benefits of a consistent and secure network configuration.
Troubleshooting Static IP Setup
In case you encounter any issues during the setup process, we are here to help. Below are some troubleshooting tips and solutions to common problems that can arise when configuring a static IP address.
1. Check Network Connectivity
If you’re experiencing connectivity issues after setting up a static IP address, ensure that all network cables are properly connected. Additionally, check if your router or modem is functioning correctly.
2. Verify Network Settings
Double-check the network settings you entered during the static IP address configuration process. Ensure that the IP address, subnet mask, gateway, and DNS server information are accurate and match the required parameters.
3. Reboot Network Devices
Try restarting your network devices, including the modem, router, and computer. Rebooting can often resolve temporary configuration issues and establish a stable connection.
4. Disable Firewall or Antivirus Software
Sometimes, firewall or antivirus software can interfere with network configurations. Temporarily disable these security programs and check if the static IP address setup issue persists.
5. Reset TCP/IP Stack
If you’re experiencing persistent network issues, resetting the TCP/IP stack can help. Open the command prompt and type in the following command: netsh int ip reset. Restart your computer and attempt the static IP address setup again.
6. Consult Network Support
If none of the troubleshooting steps have resolved your static IP address setup issues, it may be helpful to reach out to your network provider or consult a network specialist for further assistance.
By following these troubleshooting tips, you can overcome common hurdles and successfully configure a fixed IP address for your network.
Conclusion
Congratulations! You have successfully completed the setup process and now have a static IP address for your network. By following our comprehensive guide, you have ensured a consistent and secure network configuration.
A static IP address offers numerous benefits, including improved network performance and reliability. With a fixed IP, you can easily manage and access your devices, servers, and network resources.
Remember to regularly monitor and update your network settings as needed. This will help you maintain a smooth and uninterrupted connection, maximizing the efficiency of your network infrastructure.
FAQ
How do I set up a static IP address?
To set up a static IP address, you will need to access the network settings on your device. From there, you can manually assign a specific IP address, subnet mask, gateway, and DNS server information. Follow our step-by-step guide for detailed instructions.
What is the difference between a static IP address and a dynamic IP address?
A static IP address is a fixed IP address that remains the same, whereas a dynamic IP address is automatically assigned by a DHCP server and can change over time. Static IP addresses are typically used for devices that require a consistent network configuration, such as servers or printers.
How can I check if my network supports static IP assignment?
To check if your network supports static IP assignment, you can access the settings of your router or network device. Look for options related to IP address configuration and see if there is an option to manually assign an IP address. If this option is available, it indicates that your network supports static IP assignment.
What network information do I need to set up a static IP address?
To set up a static IP address, you will need to gather the following information: IP address, subnet mask, gateway, and DNS server information. This information can be obtained from your network administrator or by accessing the settings of your router or network device.
How do I configure a static IP address on a Windows operating system?
Configuring a static IP address on a Windows operating system can be done through the network settings. Go to the Control Panel, select Network and Internet, and then choose Network and Sharing Center. From there, click on Change adapter settings, right-click on your network connection, and select Properties. Finally, select Internet Protocol Version 4 (TCP/IPv4), click on Properties, and enter the required network information.
How do I configure a static IP address on a Mac?
To configure a static IP address on a Mac, go to the Apple menu, select System Preferences, and choose Network. From the list of network connections, select the one you want to configure, click on Advanced, and go to the TCP/IP tab. Change the Configure IPv4 option to Manually, then enter the required network information. Click OK to save your changes.
What should I do if I encounter issues during the static IP setup?
If you encounter any issues during the static IP setup, there are a few troubleshooting steps you can try. First, double-check the entered network information for any typos or mistakes. Ensure that your network equipment is properly configured and functioning correctly. If the problem persists, restart your device and try the setup process again. If all else fails, consult the help documentation for your specific operating system or seek assistance from your network administrator.
