Welcome to our guide on the best free VPN options for users in Singapore. With increasing concerns about online privacy and security, using a VPN has become essential for internet users. In this article, we will explore the top free VPNs that offer a secure and easy-to-use solution for Singaporean users. Whether you want to protect your online privacy or access geo-restricted content, these VPNs will ensure a safe and seamless browsing experience. When it comes to choosing a VPN, security is a top priority. These free VPNs use advanced encryption protocols to secure your internet connection and protect your personal information from prying eyes. They create a secure tunnel between your device and the internet, allowing you to browse the web anonymously and hide your real IP address. Additionally, these VPNs offer fast and reliable connections, ensuring smooth browsing and streaming experiences. Whether you’re downloading files, streaming movies, or gaming, these VPNs have you covered with their optimized servers and unlimited bandwidth. To make things even better, these free VPNs are incredibly user-friendly. With intuitive interfaces and easy setup processes, even novice users can get started in no time. You’ll be able to connect to a Singaporean IP address effortlessly and enjoy unrestricted access to websites and services. So, if you’re searching for the best free VPN for Singapore that offers not only top-notch security but also fast speeds and ease of use, keep reading. In the following sections, we will provide detailed information on the top VPN services available, their features, and how they can benefit you in protecting your online privacy and accessing your favorite content. Top VPN Services for Singapore When it comes to finding the best VPN providers in Singapore, reliability and security are key factors to consider. Singaporean users need a VPN service that offers fast download speeds and easy setup to ensure a seamless browsing experience. Here are some top VPN services that are highly recommended for users in Singapore: ExpressVPN ExpressVPN is a popular choice among users in Singapore due to its fast and stable connections. With servers located in several countries, including Singapore, users can easily access geo-restricted content while maintaining their online privacy. NordVPN NordVPN is known for its robust security features and user-friendly interface. With a vast network of servers worldwide, including servers in Singapore, NordVPN ensures users can browse the internet anonymously and securely. Surfshark Surfshark is a budget-friendly VPN option that doesn’t compromise on quality. With unlimited simultaneous connections and servers in Singapore, Surfshark allows users to protect multiple devices and enjoy fast download speeds. These VPN services offer reliable connections, strong security protocols, and user-friendly apps for easy installation and use. Whether you need a VPN for accessing geo-restricted content or protecting your online privacy, these providers have got you covered. Secure VPN for Singapore: Protect Your Online Privacy When it comes to browsing the internet, protecting your online privacy is of utmost importance. This is where a secure VPN for Singapore comes in. By using a VPN, you can ensure that your online activities remain private and anonymous, shielding your personal information from prying eyes. So, what are the key features to look for in a VPN service? Let’s take a closer look: Encryption: Look for a VPN that offers strong encryption protocols, such as AES-256. This ensures that your data is securely encrypted and cannot be intercepted by hackers or government agencies. Server Locations: A reputable VPN service should have a wide range of server locations, including servers in Singapore. This allows you to connect to a server in your own country, ensuring better speed and performance. No-Logs Policy: Choose a VPN that has a strict no-logs policy. This means that the VPN provider does not keep any logs of your online activities, ensuring that your browsing history remains private. Kill Switch: A kill switch is an essential feature that disconnects your internet connection if the VPN connection drops. This prevents any data leaks or exposure of your real IP address. How a VPN helps maintain anonymity online By using a VPN, you can mask your IP address and browse the internet under the identity of the VPN server you are connected to. This provides an additional layer of anonymity, making it difficult for anyone to track your online activities back to your actual location. Furthermore, a VPN encrypts your data, ensuring that even if someone intercepts your internet traffic, they won’t be able to decipher it. This is especially crucial when connecting to public Wi-Fi networks, which are often prone to hacking attempts. Now that you understand the importance of a secure VPN for Singapore, it’s time to choose one that best suits your needs. Let’s take a look at a comparison table of some top VPN services for Singapore: VPN Provider Features Server Locations Price NordVPN Advanced security, strict no-logs policy, fast speeds More than 5,400 servers in 59 countries Starting from $3.71 per month ExpressVPN High-speed servers, strong encryption, user-friendly interface 3,000+ servers in 94 countries, including Singapore Starting from $6.67 per month Surfshark Unlimited simultaneous connections, strong privacy features 1,700+ servers in 63 countries, including Singapore Starting from $2.49 per month These VPN providers offer excellent security features, a wide range of server locations, and competitive pricing plans. It’s important to consider your specific requirements and budget before making a decision. Remember, a secure VPN for Singapore is a valuable tool in ensuring your online privacy. By using a VPN, you can browse the internet with peace of mind, knowing that your personal information is protected from prying eyes. Fastest Speeds for Streaming with Free VPNs in Singapore In this section, we will explore the free VPN options that provide the fastest speeds for streaming in Singapore. These VPNs are optimized for streaming and offer unlimited bandwidth, ensuring a smooth and uninterrupted streaming experience for users in Singapore. The Benefits of Free VPNs for Streaming When it comes to streaming, a fast and reliable internet connection is crucial. Streaming services require high-speed connections

How To Get Unbanned From Instagram
Are you facing an Instagram ban? Don’t worry, we’ve got you covered! In this article, we will provide you with step-by-step guidance on how to get unbanned from Instagram and navigate the ban appeal process effectively. Whether you’ve violated Instagram’s terms of service or encountered an erroneous ban, we will help you understand the reasons behind the bans and provide actionable tips to reinstate your account. Getting banned on Instagram can be frustrating, especially if you rely on the platform for personal or business purposes. But fear not, there are ways to resolve the situation and get your account back up and running. In the following sections, we will explore the Instagram ban appeal process in detail. From understanding the reasons behind suspensions to submitting a compelling appeal that increases your chances of success, we’ll cover it all. We will also provide valuable tips on how to avoid future suspensions and guide you through the process of requesting an account review if necessary. If you’re eager to regain access to your Instagram account and learn how to prevent future bans, continue reading. Let’s dive into the strategies that can help you get unbanned from Instagram and ensure a positive and compliant experience on the platform. Understanding Instagram Bans and Suspensions Instagram bans and suspensions can be a frustrating experience for users. In this section, we will delve into why Instagram may take such actions and discuss the common violations of Instagram’s terms of service that can lead to a ban or suspension of your account. Posting Inappropriate Content: Violating Instagram’s community guidelines by posting content that includes nudity, violence, hate speech, or illegal activities can result in an account suspension. Engaging in Spammy Behavior: Excessively using bots, automated tools, or engaging in high-frequency, repetitive actions such as liking, following, or commenting can flag your account as spam and lead to a suspension. Harassment and Bullying: Sending harassing or abusive messages, engaging in online bullying, or creating fake accounts to harass others violates Instagram’s terms of service and can result in an account suspension. Intellectual Property Infringement: Posting content that infringes on someone else’s copyrights or trademarks can lead to an account suspension if reported by the rightful owner. To avoid having your Instagram account suspended, it is crucial to familiarize yourself with the platform’s terms of service and community guidelines. By understanding these rules and regulations, you can ensure that your content complies with Instagram’s policies and minimize the risk of violations. It’s worth noting that Instagram relies on both automated systems and user reports to detect and address violations. Therefore, it’s vital to be vigilant about your own actions and report any suspicious or inappropriate behavior you encounter on the platform. Now that you have a better understanding of the common violations that can lead to an Instagram ban or suspension, let’s move on to the next section to explore the steps you can take to appeal and potentially reinstate your banned account. How to Appeal an Instagram Ban If you find yourself dealing with a banned Instagram account, don’t worry. There are steps you can take to appeal the ban and potentially reinstate your account. In this section, we will guide you through the appeal process and provide valuable tips to increase your chances of having your banned Instagram account reinstated. Step 1: Understanding the Ban Reason The first step in appealing an Instagram ban is to understand the reason why your account was banned. This can often be found in the notification or email you received from Instagram. It’s crucial to have a clear understanding of the violation you’re being accused of so that you can address it effectively in your appeal. Step 2: Craft an Effective Appeal When submitting your appeal to Instagram, it’s vital to be concise, sincere, and provide relevant information. Start by acknowledging the mistake and explaining what actions you have taken to rectify the violation. Be sure to include any supporting evidence or context that may help strengthen your case. However, it’s essential to avoid making excuses or placing blame, as this may negatively impact your appeal. Step 3: Submitting the Appeal Once you have prepared your appeal, you can submit it directly through the Instagram app or website. Follow the instructions provided and ensure that you provide accurate and updated contact information. It’s crucial to be patient during this process as it may take some time for Instagram to review your appeal. Step 4: Strengthening Your Appeal In addition to the initial appeal, there are further strategies you can employ to increase your chances of having your banned Instagram account reinstated. Here are some helpful tips: Act promptly: It’s important to submit your appeal as soon as possible to demonstrate your commitment to resolving the issue. Be professional: Use a courteous and respectful tone in your appeal. This will create a positive impression and show Instagram that you take the situation seriously. Provide context: If there were any extenuating circumstances that led to the violation, make sure to explain them clearly in your appeal. Show compliance: Emphasize your commitment to following Instagram’s guidelines and rules moving forward. This can help assure Instagram that the violation was an isolated incident. Engage with the community: Demonstrate your positive engagement with the Instagram community by sharing examples of positive interactions or contributions you have made. By following these tips and step-by-step instructions, you can effectively appeal an Instagram ban and increase your chances of having your banned account reinstated. Remember to remain patient and maintain a professional and polite approach throughout the appeal process. Tips to Avoid Future Instagram Suspensions To ensure that your Instagram account remains in good standing and avoid the risk of future suspensions, it is essential to follow best practices and abide by the platform’s guidelines. Here are some practical tips to help you maintain a healthy and compliant presence on Instagram: Understand Instagram’s Guidelines: Familiarize yourself with the platform’s community guidelines to ensure that your content adheres to their standards. Be aware of

How To Clear Cache On Xbox One
Welcome to our guide on clearing the cache on your Xbox One console. If you’re experiencing performance issues or encountering glitches while gaming, clearing the cache can be a simple solution. By following the step-by-step instructions in this article, you’ll be able to optimize your console’s performance and ensure a smooth gaming experience. Why Clearing the Cache is Important for Xbox One Performance Clearing the cache on your Xbox One console is an essential step in optimizing its performance and ensuring a smooth gaming experience. The cache is a temporary storage location that stores data from games, apps, and system processes. Over time, this cache can become bloated with unnecessary files, leading to various issues such as sluggish performance and game crashes. By regularly clearing the cache on your Xbox One, you can reap several benefits: Improved Speed: Accumulated cache can slow down your console’s performance. Clearing it frees up valuable resources, allowing your Xbox One to run faster and smoother. Enhanced Stability: A bloated cache can lead to stability issues, including freezing and crashing. Clearing the cache helps resolve these issues and ensures a more stable gaming experience. Optimized Storage: Clearing the cache removes temporary files that take up valuable storage space on your Xbox One. This gives you more room for game installations and updates. Clearing the cache on your Xbox One is a straightforward process that can be done using various methods. In the next section, we will provide a step-by-step guide on how to clear the cache on your Xbox One console. Step-by-Step Guide to Clearing Cache on Xbox One In this section, we will provide a detailed step-by-step guide on how to clear the cache on your Xbox One console. Clearing the cache is essential to ensure optimal performance and resolve any issues related to cached files. Method 1: Clearing Temporary Files On your Xbox One home screen, navigate to “Settings”. Select “System” and then choose “Storage”. Under the “Manage Storage” section, click on “Internal”. Scroll down and find “Temporary Files”. Choose “Clear” to delete all temporary files from your console. Method 2: Clearing System Cache If clearing temporary files did not resolve the performance issues, you can try clearing the system cache. Follow these steps: Power off your Xbox One console. Unplug the power cord from the back of the console. Wait for at least 10 seconds. Plug the power cord back in. Press the Xbox button on the front of the console to power it on. By following these steps, you will clear the system cache on your Xbox One. Method 3: Clearing Cache on Individual Games In some cases, clearing the cache on individual games can help resolve game-specific issues. Here’s how to do it: Highlight the game you want to clear the cache for on your Xbox One home screen. Press the “Menu” button on your controller (the button with three horizontal lines). Select “Manage game & add-ons”. Go to the “Saved data” tab. Choose “Reserved space” and select “Clear”. By following these steps, you will clear the cache for the specific game. Clearing the cache on your Xbox One console is a simple process that can help optimize performance and resolve any cache-related issues. By regularly performing these steps, you can ensure a smooth gaming experience on your Xbox One. Troubleshooting Common Issues with Clearing Cache on Xbox One While clearing the cache on your Xbox One console can greatly improve performance, you may encounter a few common issues along the way. Don’t worry, though – we’ve got you covered! Here are some troubleshooting tips to help you overcome these challenges and ensure successful cache clearing: Error Messages or Freezing If you experience error messages or freezing during the cache clearing process, try performing a hard reset on your Xbox One. Simply hold down the power button for 10 seconds until the console turns off, then unplug the power cord and wait for 10 seconds. Finally, plug the power cord back in and turn on your console. This should resolve any temporary issues that may be causing the errors or freezing. Slow Performance After Clearing Cache If you notice a slowdown in performance after clearing the cache, it could be due to the system rebuilding its cache files. This is a normal process that may take some time. Give your console a few minutes to rebuild the cache, and you should see an improvement in performance. If the problem persists, try performing a system update to ensure that all necessary software updates are applied. Missing or Corrupted Game Data In some cases, clearing the cache may result in missing or corrupted game data. To fix this, you can try reinstalling the affected games. Go to “My Games & Apps” on your Xbox One dashboard, navigate to the affected game, and select “Manage game.” From there, you can choose to uninstall the game and reinstall it. This should restore any missing or corrupted data and allow you to continue playing without any issues. Persistent Issues If you continue to experience issues even after clearing the cache, it’s possible that there may be an underlying hardware or software problem with your Xbox One. In such cases, we recommend contacting Xbox Support for further assistance. They have a team of experts who can help diagnose and resolve any persistent issues you may be facing. By following these troubleshooting tips, you can overcome common issues that may arise while clearing the cache on your Xbox One console. Remember, clearing the cache is an important step in optimizing your console’s performance, so don’t let a few hiccups discourage you from reaping the benefits. Happy gaming! Conclusion In conclusion, clearing the cache on your Xbox One is a vital maintenance task that can greatly optimize your gaming experience. By regularly clearing the accumulated cache, you can enhance the performance of your console and troubleshoot any related issues. Follow the step-by-step guide provided in this article to clear the cache on your Xbox One effectively. Whether you are experiencing
How To Secure Online Banking (Essential Tips)
Online banking has revolutionized the way we manage our finances, offering convenience and accessibility. However, it also comes with inherent security risks. Protecting your online banking accounts is essential to safeguard your financial information and prevent unauthorized access. In this article, we will explore essential tips to enhance the security of your online banking experience. Online Banking Tips 1. Strong Passwords In the digital age, a strong password is your first line of defense against cyber threats. When creating a password for your online banking accounts, ensure it is complex and unique. Avoid using easily guessable information such as birthdays or pet names. Instead, opt for a combination of uppercase and lowercase letters, numbers, and special characters. Creating a Secure Password Use a minimum of 8 characters. Avoid dictionary words or common phrases. Consider using a passphrase for added security. Change your password regularly. 2. Two-Factor Authentication (2FA) Two-Factor Authentication (2FA) adds an extra layer of security to your online banking accounts by requiring a secondary form of verification in addition to your password. This could be a code sent to your mobile device or generated by an authenticator app. Setting Up 2FA Navigate to your account settings. Enable Two-Factor Authentication. Choose your preferred method of verification (SMS, authenticator app, etc.). Follow the prompts to complete the setup process. 3. Keeping Software Updated Regularly updating your computer, mobile devices, and banking apps is crucial to maintaining security. Software updates often include patches for known vulnerabilities, helping to protect your devices from potential threats. Importance of Updates Patch security vulnerabilities. Enhance performance and stability. Ensure compatibility with new features. Stay ahead of emerging threats. 4. Using Secure Networks Avoid conducting online banking transactions on public Wi-Fi networks, as they are susceptible to hacking and eavesdropping. Instead, use secure, password-protected networks such as your home Wi-Fi or a trusted cellular network. Avoiding Public Wi-Fi Use a Virtual Private Network (VPN) for added security. Disable automatic Wi-Fi connections. Verify network authenticity before connecting. Consider using mobile data for banking transactions on the go. 5. Beware of Phishing Attempts Phishing emails and messages are a common tactic used by cybercriminals to steal sensitive information. Be cautious of emails posing as legitimate institutions and avoid clicking on suspicious links or downloading attachments. Recognizing Phishing Emails Check the sender’s email address for discrepancies. Look for spelling and grammatical errors. Avoid providing sensitive information via email. Verify requests for personal or financial information directly with the institution. 6. Monitoring Account Activity Regularly reviewing your bank statements and transaction history can help detect unauthorized activity and fraudulent charges early on. Report any discrepancies or suspicious transactions to your bank immediately. Regular Review of Statements Set aside time each month to review your statements. Verify the accuracy of transactions. Look for unfamiliar charges or withdrawals. Report any suspicious activity to your bank. 7. Enabling Account Alerts Many banks offer account alert features that notify you of specific account activity in real-time. Take advantage of these alerts to stay informed about your account’s status and receive timely notifications for unusual activity. Real-Time Notifications Set up alerts for large transactions. Enable alerts for account logins from new devices. Receive notifications for low balance or overdrafts. Customize alerts based on your preferences and security needs. 8. Securing Devices Protect your devices with up-to-date antivirus software and firewalls to prevent malware infections and unauthorized access. Consider using dedicated devices or secure browsers for online banking to ensure a secure environment for financial transactions. Using Antivirus Software Install reputable antivirus software on all your devices. Enable real-time scanning and automatic updates. Regularly run malware scans to detect and remove threats. Avoid downloading software from untrusted sources. 9. Educating Yourself Staying informed about common online threats and best practices for online security is key to protecting your online banking accounts. Take the time to educate yourself and stay vigilant against evolving cyber threats. Staying Informed about Security Threats Follow reputable cybersecurity blogs and news sources. Participate in online security awareness programs. Attend workshops or webinars on online security. Share knowledge with friends and family to promote collective awareness. Conclusion Securing your online banking accounts is essential in today’s digital landscape where cyber threats are prevalent. By implementing the essential tips outlined in this article, you can enhance the security of your online banking experience and protect your financial assets from unauthorized access and fraud. FAQs Can I use the same password for multiple online banking accounts? It’s not recommended to use the same password for multiple accounts, including online banking. Using unique passwords for each account enhances security and reduces the risk of multiple accounts being compromised in case of a breach. Is it safe to access my online banking accounts from a public computer? Accessing online banking accounts from public computers or shared devices poses significant security risks. It’s advisable to avoid such practices as these devices may be compromised or infected with malware. What should I do if I suspect fraudulent activity on my online banking account? If you notice any suspicious or unauthorized transactions on your online banking account, contact your bank immediately to report the activity. They can assist you in securing your account and investigating the incident. Are mobile banking apps secure? Mobile banking apps provided by reputable financial institutions are generally secure. However, it’s essential to download apps from official app stores and ensure they are regularly updated to address security vulnerabilities. How often should I change my online banking password? It’s recommended to change your online banking password periodically, ideally every 3-6 months. Regular password changes help mitigate the risk of unauthorized access to your account.
Site To Site VPN vs Remote Access VPN
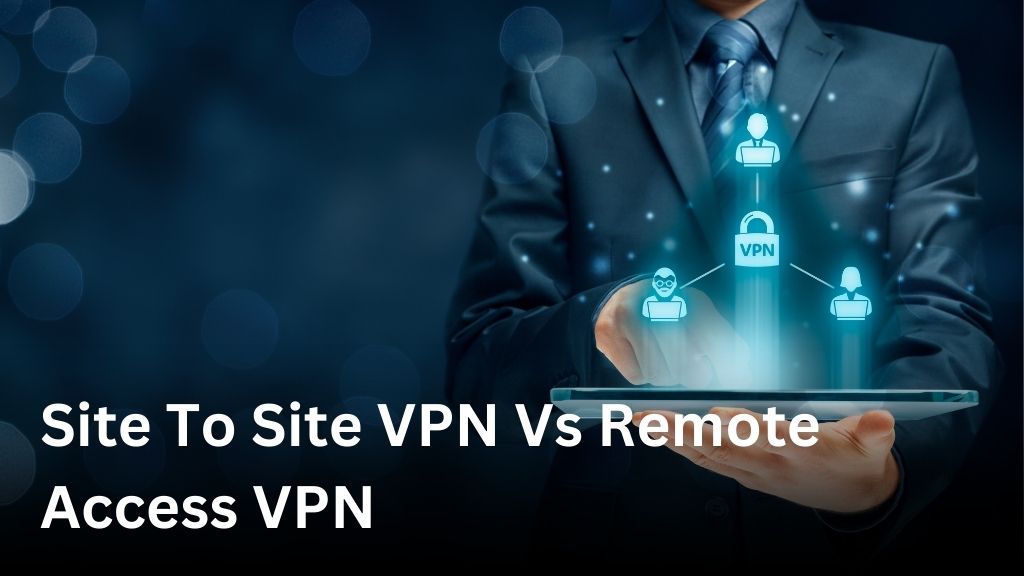
Are you confused about the differences between site to site VPN and remote access VPN? In this article, we will provide you with a comprehensive overview of these two types of VPNs and help you understand their unique characteristics and benefits. A site to site VPN, also known as a network-to-network VPN, is a connectivity solution that allows multiple locations or networks to securely connect to each other over the internet. It enables seamless communication and data transfer between different sites of an organization. On the other hand, a remote access VPN, also referred to as a client-to-site VPN, is designed to provide secure remote access to a company’s network for individual users. It allows employees, partners, or authorized users to connect to their organization’s network from any location using their own devices. Now, you might be wondering, what are the key differences between these two types of VPNs? Well, besides their primary use cases, site to site VPNs and remote access VPNs differ in terms of connectivity options and network security solutions they offer. Site to site VPNs establish secure connections between entire networks, enabling them to share resources, communicate, and collaborate. They are ideal for organizations with multiple locations or branch offices that need to securely connect their internal networks. On the other hand, remote access VPNs provide individual users with secure access to their organization’s network resources. This type of VPN is commonly used by remote workers, business travelers, and authorized external parties who need to access specific resources or applications remotely. When it comes to connectivity options, site to site VPNs typically require dedicated hardware or virtual appliances at each site, ensuring a continuous and reliable connection. Remote access VPNs, on the other hand, can be accessed using various client applications or web-based portals, making them easily accessible from different devices and locations. Ultimately, choosing the right VPN for your organization depends on your specific needs and network security requirements. Understanding the differences between site to site VPN and remote access VPN will help you make an informed decision that aligns with your business goals. In the following sections, we will dive deeper into the inner workings of site to site VPNs and remote access VPNs, explore their configurations, and highlight the key benefits and considerations for each type. Stay tuned to gain a comprehensive understanding of these two essential VPN types and find the perfect fit for your network security needs. Understanding Site To Site VPN A site to site VPN is a type of virtual private network that connects two or more networks in separate locations, enabling secure communication and data transfer between them. Unlike remote access VPNs that allow individual users to connect to a private network remotely, site to site VPNs establish a secure connection between entire networks. Setting up a site to site VPN requires careful configuration to ensure seamless connectivity and robust security. Here is a step-by-step guide to configuring a site to site VPN: Identify the networks that need to be connected: Determine the networks that need to communicate with each other and define their IP address ranges. Choose VPN hardware or software: Select the appropriate VPN hardware or software solution that suits your network infrastructure and security requirements. Configure VPN devices or servers: Set up the VPN devices or servers at each site and configure the necessary settings, including authentication methods, encryption protocols, and IPsec policies. Establish VPN tunnels: Create VPN tunnels between the VPN devices or servers at each site to establish a secure communication channel. Test and troubleshoot: Verify the connectivity between the connected networks and troubleshoot any issues that may arise during the configuration process. Implementing best practices is crucial to ensure the effectiveness and security of site to site VPNs. Here are some recommended practices: Use strong encryption: Utilize robust encryption algorithms, such as AES, to protect sensitive data transmitted through the VPN. Implement proper access controls: Define granular access controls to restrict network access within the VPN to authorized users and devices. Regularly update VPN software and firmware: Stay up to date with the latest security patches and updates to mitigate potential vulnerabilities. Monitor VPN traffic: Monitor VPN traffic to detect any suspicious activities or unauthorized access attempts. Implement multi-factor authentication: Strengthen the security of the VPN by requiring additional authentication factors, such as tokens or biometrics. While site to site VPNs offer several advantages, including greater network integration and seamless communication between connected networks, they also have certain limitations. It’s essential to consider the following aspects: Cost: Deploying and maintaining site to site VPN infrastructure can be more expensive compared to remote access VPNs. Complexity: Setting up and managing site to site VPNs can be more complex due to the involvement of multiple networks and devices. Scalability: Scaling a site to site VPN to accommodate a growing number of networks or users may require additional resources and configuration. Exploring Remote Access VPN Remote access VPN is a widely used network solution that enables users to securely access resources from outside the corporate network. It allows remote workers, business partners, and clients to establish a secure connection to the organization’s network over the internet. Setting up a remote access VPN involves a series of configuration steps, ensuring that both the client device and the VPN server are properly configured. The exact steps depend on the VPN software or service being used, but generally involve installing the VPN client software and configuring the necessary connection settings. When implementing a remote access VPN, several best practices should be followed to ensure its effectiveness and security: Use strong authentication methods: Implementing multi-factor authentication or certificate-based authentication can significantly enhance the security of a remote access VPN. Enforce strong encryption: Remote access VPNs should use strong encryption algorithms to protect data transmitted over the connection. AES-256 encryption is highly recommended. Regularly update VPN software: Keeping the VPN software up to date with the latest security patches is crucial to safeguard against known vulnerabilities. Implement access controls:

How To Clear Cache On Android (Quick Guide)
Welcome to our quick guide on how to clear the cache on your Android device! If you’re looking to improve the performance and storage optimization of your Android device, clearing the cache is a simple and effective solution. Over time, your Android device accumulates temporary files and data from various apps and processes, which can slow down your device and take up valuable storage space. Clearing the cache helps to remove these unnecessary files, ensuring your Android device runs smoothly and efficiently. In this tutorial, we’ll provide you with easy-to-follow steps on how to clear the cache on your Android device, enabling you to reclaim storage space and enhance overall performance. Whether you’re a tech-savvy user or new to Android, our guide will walk you through the process and help you master cache clearing in no time. So, let’s get started and learn how to clear the cache on your Android device. By the end of this tutorial, you’ll have the knowledge and confidence to keep your device running at its best! Why Clearing Android Cache Is Important Clearing the cache on your Android device is an essential task that can greatly benefit the overall performance and storage optimization of your device. By understanding the importance of cache management, you can ensure a smoother and more efficient experience while using your Android device. When you use various apps and browse the internet on your Android device, temporary data files and cached information are stored on your device’s storage. Over time, these cached files can accumulate and take up valuable storage space, potentially causing your device to slow down. Here are some key reasons why clearing the cache is important for your Android device: Improved Performance: Clearing the cache helps remove unnecessary files and data that may be hindering the performance of your device. By doing so, you can experience faster app launches, smoother multitasking, and overall improved responsiveness. Optimized Storage: By clearing the cache, you can reclaim valuable storage space on your Android device. This is particularly important if you have limited storage capacity, preventing your device from running out of space and causing performance issues. Enhanced Privacy: Cache files can sometimes contain sensitive information, such as login credentials or personal data. Clearing the cache can help protect your privacy by removing these cached files and reducing the risk of unauthorized access to your information. To effectively manage the cache on your Android device, it is recommended to implement certain cache optimization techniques. These techniques include regularly clearing the cache, using cache management apps, and selectively clearing the cache for specific apps. In the next sections, we will provide detailed tutorials and tips on how to clear the app cache and system cache on your Android device. We will also explore the best cache clearing methods and provide additional tips for efficient cache management, helping you optimize the performance and storage of your Android device. Clearing App Cache on Android If you’ve noticed that your Android device has been running slower or you’re experiencing app crashes, it’s time to clear the app cache. Clearing the cache for individual apps can help free up storage space and improve app performance. In this tutorial, we’ll walk you through the steps to clear the app cache on your Android device. Open the Settings app on your Android device. Scroll down and tap on Apps or Applications (depending on your device). Here, you’ll see a list of all the apps installed on your device. Tap on the app for which you want to clear the cache. On the app’s details page, tap on Storage or Storage & cache. Under the Cached data section, you’ll see the amount of space the app cache is occupying. Tap on Clear cache to free up this space. A confirmation message will appear asking if you want to clear the app cache. Tap on OK to proceed. Repeat these steps for other apps that you want to clear the cache for. By regularly clearing the app cache on your Android device, you can help optimize its performance and ensure smoother app usage. Remember to repeat this process periodically to keep your device running efficiently. Clearing System Cache on Android In this section, we will guide you through the process of clearing the system cache on your Android device. Clearing the system cache can help resolve various system-related issues and improve overall device performance. Best Cache Clearing Methods for Android When it comes to optimizing the cache on your Android device, there are several effective methods to choose from. Clearing the cache regularly can help improve device performance and storage optimization. In this section, we will explore some of the best cache clearing methods available for Android devices. Let’s dive in: 1. Clearing Cache Through App Settings One of the simplest ways to clear the cache is through the app settings on your Android device. Follow these steps: Go to your device’s “Settings” menu. Select “Apps” or “Applications” from the menu. Choose the specific app whose cache you want to clear. Tap on “Storage” or “Storage & cache.” Select the “Clear cache” option. This method allows you to clear the cache for individual apps, freeing up storage space and potentially resolving any app-related issues. 2. Using Built-in Storage Settings In addition to clearing cache through the app settings, many Android devices also offer a built-in storage settings feature that allows you to clear cache across multiple apps simultaneously. Here’s how: Open your device’s “Settings” menu. Tap on “Storage” or “Storage & USB.” Select “Cached data” or “Cached files.” Confirm the action when prompted to clear the cache. This method provides a quick and convenient way to clear cache for multiple apps at once, saving you time and effort. 3. Utilizing Third-Party Cache Clearing Apps If you prefer a more comprehensive cache clearing solution, you can consider using third-party cache clearing apps. These apps offer advanced cache management features and allow you to clear cache for multiple apps and system processes. Some popular cache clearing apps include Clean Master, CCleaner, and SD Maid. Remember that choosing the most
Best Remote Access VPN: Top Picks for Secure Networks
Welcome to our guide on the best remote access VPN services available. In today’s digital landscape, ensuring secure remote access is essential for businesses and individuals alike. With the increasing number of remote workers and a growing need for reliable virtual private networks, choosing the right service is paramount. In this article, we will explore the top picks for secure remote access VPNs. We understand the importance of safeguarding sensitive data and providing fast and efficient remote connectivity. Whether you’re a remote worker or a business owner, our guide will help you make an informed decision. From enhanced security features to user-friendly interfaces, we have researched and analyzed various remote access VPN options to bring you the best recommendations. Our goal is to provide you with valuable insights, ensuring that your remote work experience is seamless and secure. So, if you’re searching for the best remote access VPN service or looking to upgrade your existing one, stay tuned. We will help you navigate the vast ocean of options and find the perfect solution for your secure networking needs. Benefits of Remote Access VPNs Remote access VPNs offer numerous benefits for individuals and businesses alike. These solutions provide fast and secure remote access, ensuring efficient work processes regardless of location. With the rise of remote work, it’s crucial to employ affordable VPN options that cater specifically to remote work requirements. Fast Remote Access Solutions One of the primary advantages of remote access VPNs is their ability to provide fast and seamless connectivity. These solutions enable individuals to access their work networks remotely, granting them the same level of access and productivity as if they were physically present in the office. Improved Efficiency: Remote access VPNs eliminate the need for time-consuming commute or travel. Employees can quickly connect to their office networks from any location, saving valuable time and allowing them to focus on getting work done. Instant Collaboration: By utilizing remote access VPNs, teams can collaborate effortlessly. Colleagues can securely access shared files, communicate in real-time, and collaborate on projects seamlessly, facilitating efficient teamwork regardless of geographical barriers. Increased Flexibility: With remote access VPNs, individuals have the freedom to work from anywhere. Whether it’s from the comfort of their homes, while traveling, or in a remote location, employees can maintain their productivity and complete tasks on their own schedules. Affordable VPN for Remote Work When it comes to remote work, affordability is a significant factor to consider. Fortunately, there are VPN options that offer secure remote access at affordable prices, ensuring that businesses and individuals can access the necessary tools without breaking the bank. Cost-Effective Solutions: Affordable remote access VPNs provide budget-friendly options without compromising security or performance. These solutions cater specifically to remote work requirements, making them an ideal choice for businesses and individuals looking to optimize their productivity without excessive costs. Value for Money: By choosing an affordable VPN service, businesses can ensure that they are getting the most value for their investment. These solutions offer the necessary features and security protocols required for remote work, ensuring a seamless and secure remote access experience. Scalability: Affordable VPNs often provide scalable plans, allowing businesses to grow their remote workforce without incurring significant additional expenses. These solutions offer flexibility, accommodating the changing needs and demands of remote work environments. Selecting the Right Remote Access VPN When it comes to remote access VPNs, choosing the right one is crucial for ensuring secure connectivity. With the increasing demand for remote work and the need for reliable virtual private networks, it’s important to consider certain factors before making your decision. In this section, we will discuss the importance of security for remote access and highlight the best VPN options for secure remote connectivity. Factors to Consider Security: The foremost consideration when selecting a remote access VPN is security. Look for VPN providers that offer strong encryption protocols, such as AES-256, to protect your data and communications. Privacy: Your remote access VPN should prioritize your privacy by implementing a strict no-logs policy. This ensures that your online activities are not stored or monitored. Speed and Performance: A reliable remote access VPN should provide fast and stable connections, allowing you to seamlessly access your network resources without any lag. Compatibility: Make sure the VPN is compatible with your devices and operating systems. It should support a wide range of platforms, including Windows, macOS, iOS, and Android. User-Friendly Interface: Look for a remote access VPN that offers an intuitive and user-friendly interface, making it easy for you to connect and navigate the VPN client. Customer Support: Opt for VPN providers that offer responsive and helpful customer support, available through various channels like live chat, email, or phone. Best VPN Options for Secure Remote Connectivity When it comes to the best VPNs for secure remote access, two providers stand out: ExpressVPN: With its military-grade encryption, strict privacy policy, and lightning-fast speeds, ExpressVPN is a top-rated VPN for remote connectivity. It offers a user-friendly interface and excellent customer support, making it an ideal choice for secure remote access. NordVPN: Known for its advanced security features and vast global server network, NordVPN is another excellent option for remote access. It offers double encryption, obfuscated servers, and a reliable kill switch, ensuring optimal security and privacy. By considering these factors and choosing one of the top-rated VPN options, you can ensure a secure and reliable remote access experience with peace of mind. Features to Look for in a Remote Access VPN When selecting a remote access VPN, there are several key features you should consider to ensure secure access and find the best provider for your needs. By prioritizing these features, you can enhance your remote connectivity and protect your valuable data. 1. Secure Access: The foremost feature to look for in a remote access VPN is its ability to provide secure access. Ensure that the VPN utilizes strong encryption protocols and offers features like multi-factor authentication and secure tunneling to prevent unauthorized access to your network. 2. Reliable Performance: Opt for
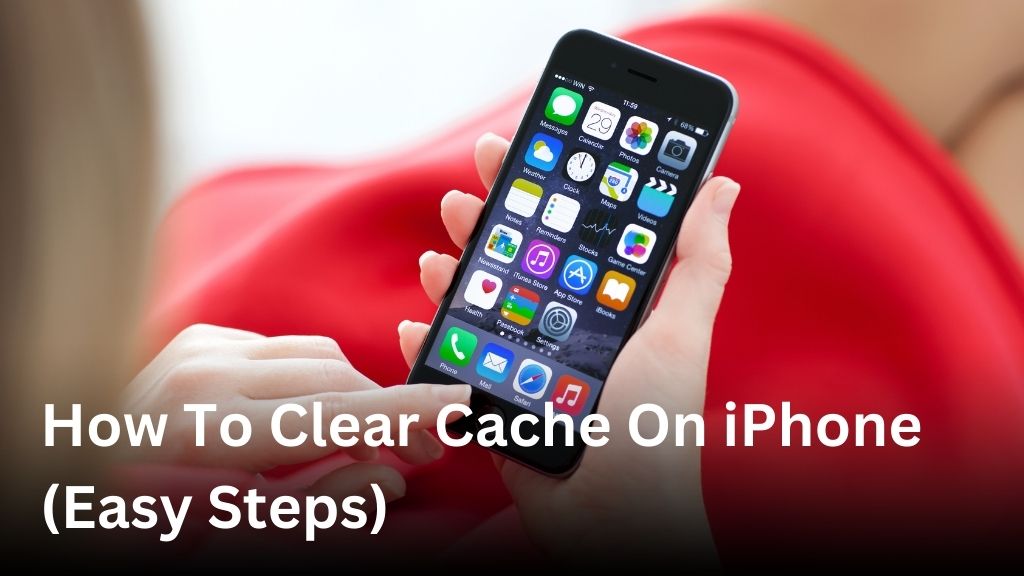
How To Clear Cache On iPhone (Easy Steps)
Welcome to our guide on how to clear the cache on your iPhone! If you’re looking to free up storage space and improve the performance of your device, you’ve come to the right place. Clearing the cache on your iPhone is a simple and effective way to optimize its performance. In this article, we’ll walk you through the easy steps to clear the cache on your iPhone and ensure that it runs smoothly. Whether you have the latest iPhone 12 or an older model, these steps will work for you. Understanding Cache on iPhone Before we dive into the steps to clear the cache on your iPhone, let’s take a moment to understand what cache is and why it’s necessary to clear it regularly. Cache is a temporary storage area where your iPhone stores data from websites and apps for faster access in the future. It includes images, scripts, and other files that your device downloads when you visit a website or use an app. While cache improves the loading speed of websites and apps, over time, it can accumulate and take up significant storage space on your iPhone. Consequently, it can negatively impact your device’s performance, causing sluggishness and reduced storage capacity. Clearing the cache on your iPhone periodically is essential to maintain optimal performance and ensure efficient storage management. By doing so, you can free up valuable storage space and improve the responsiveness of your device. Now that you have a basic understanding of cache and its impact on your iPhone, let’s move on to clearing it in the next sections. Clearing Safari Cache on iPhone Safari, the default web browser on iPhones, stores temporary data in the cache. Clearing the Safari cache on your iPhone is essential to optimize your browsing experience and remove any stored data that may be occupying precious storage space. Follow these easy steps to clear the cache on your iPhone: Open the “Settings” app on your iPhone. Scroll down and tap on “Safari”. Under the “Safari” settings, scroll down to find “Clear History and Website Data” and tap on it. A confirmation popup will appear. Tap on “Clear History and Data” to proceed. The Safari cache on your iPhone will now be cleared, freeing up storage space and removing any stored data. By regularly clearing the Safari cache on your iPhone, you can ensure smoother browsing sessions and prevent the accumulation of unnecessary data. Enjoy a faster and more responsive browsing experience by following these simple steps to clear the Safari cache on your iPhone. Clearing App Cache on iPhone In addition to Safari, other apps on your iPhone also store cache data. Clearing the cache for specific apps can help you free up storage space and ensure smooth app performance. Here’s how: Open the “Settings” app on your iPhone. Scroll down and tap on the “General” option. Tap on “iPhone Storage.” Wait for a few seconds while your iPhone calculates the storage used by different apps. Scroll down and select the app for which you want to clear the cache. Tap on “Offload App” to remove the app from your iPhone but keep its data, or tap “Delete App” to remove the app and all its data. By following these steps, you can easily clear the cache for specific apps on your iPhone, freeing up valuable storage space and ensuring optimal app performance. Managing iPhone Storage Clearing cache is just one aspect of managing your iPhone’s storage. If you’re running out of space on your device, there are several tips and tricks you can follow to free up valuable storage space. 1. Manage Photos and Videos The photos and videos on your iPhone can quickly take up a significant amount of space. To free up memory, consider deleting any unnecessary or duplicate images. You can also use cloud storage services like iCloud or Google Photos to back up your media files and access them whenever needed. 2. Delete Unnecessary Apps Over time, you may accumulate a collection of apps that you no longer use. Deleting these unused apps can help reclaim storage space. Simply tap and hold on the app icon until it wiggles, then tap the “x” button to delete it. Remember to also check for any hidden or forgotten apps in your App Library. 3. Offload Unused Apps If you want to keep the app data but still free up space, you can choose to offload unused apps. This option removes the app from your device while retaining the data. To offload an app, go to Settings > General > iPhone Storage, select the app, and tap “Offload App.” 4. Clear Message Conversations Text messages, especially those with attachments, can consume a significant amount of storage space. Consider deleting old message threads or attachments to free up memory. Alternatively, you can enable the “Auto Delete” feature in the Messages settings to automatically remove older messages after a set period. 5. Manage Offline Music and Podcasts If you have a large collection of offline music or podcasts, they can eat up your storage. Review your saved music and podcast episodes and remove any that you no longer listen to or need offline access to. You can always stream them later when you have an internet connection. 6. Store Files in the Cloud If you frequently work with files on your iPhone, consider using cloud storage services such as Dropbox, Google Drive, or iCloud Drive. By storing your files in the cloud, you can access them whenever needed, without taking up valuable storage space on your device. 7. Clear Cached Data In addition to clearing cache, you can also remove other types of cached data on your iPhone. Go to Settings > Safari and tap “Clear History and Website Data” to remove browsing history, cookies, and website data. For other apps, check their settings for options to clear cached data. By following these tips and tricks, you can effectively manage your iPhone storage and create more space for the things that
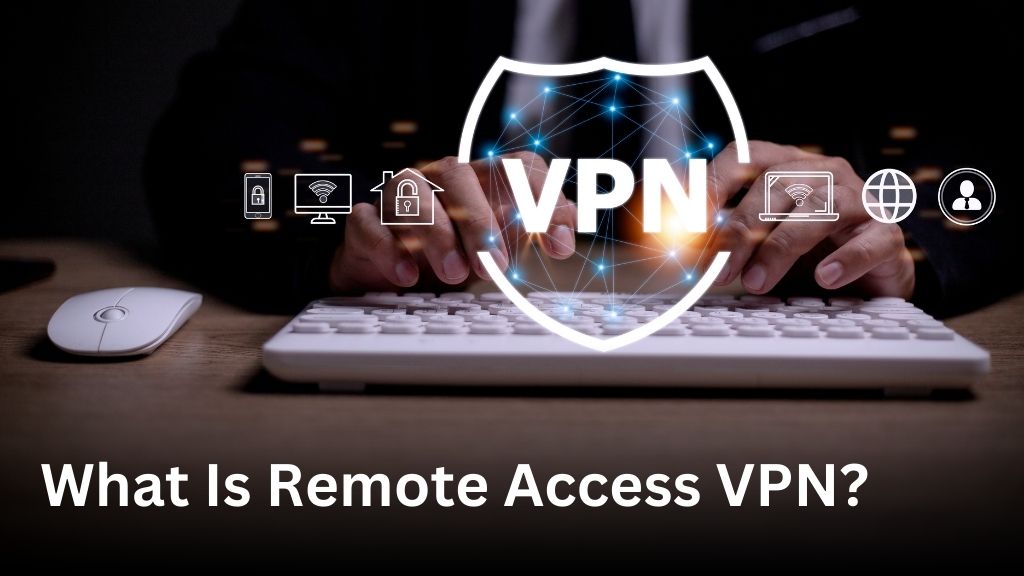
What Is Remote Access VPN?
Are you concerned about online security and connectivity? Do you need safe access to networks from anywhere? Look no further than remote access VPN! In this article, we will explore the concept of remote access VPN and its significance in enhancing online security and connectivity. Whether you are an individual or a business, remote access VPN allows you to enjoy safe access to networks from anywhere in the world. Understanding Remote Access VPN In this section, we will delve into the concept of Remote Access VPN and its significance in enabling secure remote access connections to private networks. We will define what a VPN is and explain the key features of this virtual private network technology. What is a Virtual Private Network (VPN)? A Virtual Private Network (VPN) is a technology that creates a secure and encrypted connection over a public network, such as the internet. By utilizing encryption protocols, a VPN ensures that data transmitted between devices is protected from potential threats and interceptions. VPN technology creates a secure “tunnel” through which data can pass, allowing users to access private networks remotely and securely. The Role of Remote Access VPN A remote access VPN plays a crucial role in enabling individuals and employees to connect to private networks from remote locations, such as home or while traveling. It provides a secure channel for accessing sensitive data and resources located within the private network, as if the user were physically present at the office or on-site. Secure Remote Access Connection A remote access VPN establishes a secure connection between the user’s device and the private network, ensuring the confidentiality and integrity of the data transmitted. This connection is achieved through encryption protocols that authenticate and encrypt the communication, preventing unauthorized access and ensuring data privacy. With a remote access VPN, users can securely access their company’s resources, such as files, applications, or internal servers, from anywhere in the world. This technology eliminates the need for physical presence in the office and enables seamless collaboration and productivity, even when working remotely. Understanding the fundamentals of remote access VPN is crucial in realizing the benefits of this technology in enhancing online security and facilitating remote access connections to private networks. In the following sections, we will explore the importance of remote access VPN in enhancing online security, the advantages it offers, and best practices for its usage. Enhancing Online Security with Remote Access VPN When it comes to online security, remote access VPN plays a crucial role in safeguarding sensitive data and protecting against potential threats. By using a virtual private network (VPN) for remote access, individuals and businesses can establish secure connections and encrypt their online activities, ensuring the confidentiality and integrity of their information. The Importance of Remote Access VPN Remote access VPN is essential for enhancing online security because it creates a secure tunnel between the user’s device and the private network they are connecting to. This tunnel encrypts the data transmitted, making it unreadable to anyone who might intercept it. This encryption ensures that sensitive information, such as login credentials, financial data, and intellectual property, remains protected from unauthorized access. Moreover, remote access VPN allows users to securely access company networks from remote locations, such as home or public Wi-Fi networks. This is especially crucial in today’s interconnected world, where remote work and mobile connectivity have become the norm. With a remote access VPN, individuals can enjoy the convenience of working from anywhere while ensuring the security of their online activities. Secure Connections and Data Encryption One of the primary functions of a remote access VPN is to establish secure connections between the user’s device and the private network. This ensures that all data transmitted between the two endpoints is protected from eavesdropping and tampering. By encrypting the data, VPNs make it virtually impossible for hackers or cybercriminals to intercept and decipher the information. With strong encryption algorithms in place, remote access VPNs provide a high level of security and give users peace of mind when accessing sensitive resources remotely. Whether it’s accessing corporate servers, confidential files, or internal systems, users can trust that their information is well-protected throughout the remote access session. Protecting Sensitive Data from Potential Threats By routing internet traffic through a remote access VPN, users also protect themselves from potential threats lurking on public or unsecured networks. Public Wi-Fi networks, for example, are notorious for their lack of security measures, making them easy targets for hackers looking to intercept sensitive data. A remote access VPN encrypts the user’s data before it leaves their device, effectively mitigating the risks associated with unsecured networks. This ensures that even if a hacker manages to intercept the data, it remains encrypted and unreadable, rendering it useless. Furthermore, remote access VPNs often provide additional security features such as firewall protection and malware detection to provide a comprehensive defense against various online threats. These features add an extra layer of security, safeguarding users from potential attacks and ensuring the integrity of their online activities. Overall, remote access VPNs are an integral component of online security. They offer secure connections, data encryption, and protection against potential threats, making them essential for individuals and businesses alike. By implementing remote access VPN solutions, users can enjoy the benefits of safe and secure remote access without compromising their online security. Advantages of Remote Access VPN Using a remote access VPN offers numerous benefits that enhance online security, improve connectivity, and enable seamless remote access technology. Let’s explore some of these advantages: Enhanced Online Security Remote access VPNs provide a secure and encrypted connection, safeguarding your sensitive data from potential threats. By using a remote access VPN, your online activities are protected, ensuring that your confidential information remains private and secure. Improved Connectivity With a remote access VPN, you can connect to your private network from anywhere in the world. Whether you’re working remotely or traveling, a remote access VPN allows you to have uninterrupted access to resources and files on your network, boosting

Understanding What Is Keylogger Explained
Welcome to our comprehensive guide on keyloggers! In this article, we will delve into the world of keyloggers, providing you with an in-depth understanding of what they are, their definition, and the various types of keylogger software available. But first, let’s address the question on everyone’s mind – what is a keylogger? Essentially, a keylogger is a type of malicious software designed to record and monitor every keystroke made on a computer or mobile device. This means that any passwords, credit card details, or other sensitive information you enter can be captured by the keylogger. Keyloggers come in different forms and can be classified as hardware or software-based. Each type has its own way of capturing keystrokes, from intercepting signals between the keyboard and the computer to capturing data from the device’s memory. Now that we have a basic understanding of keyloggers and their definition, let’s explore the various types of keylogger software in more detail. By understanding the different types, you will be better equipped to protect yourself against these stealthy threats to your digital safety. Types of Keyloggers Keyloggers are powerful tools that can be used for various purposes, from cybersecurity to surveillance. In this section, we will explore the different types of keyloggers that exist and how they work to capture and record keystrokes. Hardware Keyloggers Hardware keyloggers are physical devices that are discreetly attached to the computer or the keyboard itself. They intercept and record keystrokes as the user types, storing the data in their internal memory or transmitting it remotely to the attacker. Hardware keyloggers are difficult to detect since they do not rely on software or leave any trace on the computer system. Software Keyloggers Software keyloggers are programs or applications installed on a computer or mobile device. These keyloggers run in the background, capturing all keystrokes entered by the user. The recorded data is then stored locally or sent to a remote server. Software keyloggers can be installed by malicious actors through email attachments, downloaded files, or compromised websites. Memory-Injecting Keyloggers Memory-injecting keyloggers are a type of sophisticated keylogger that utilize advanced techniques to capture keystrokes. These keyloggers exploit vulnerabilities in the operating system, injecting code into the memory space of other running processes. By doing so, they can intercept keystrokes without relying on traditional logging methods, making them more difficult to detect. Type of Keylogger Description Hardware Keyloggers Physical devices attached to the computer or keyboard to intercept and record keystrokes. Software Keyloggers Programs or applications installed on a device to capture and record keystrokes. Memory-Injecting Keyloggers Sophisticated keyloggers that exploit vulnerabilities and inject code into the memory space of other processes. Impacts of Keyloggers on Digital Safety Keyloggers pose a serious threat to your digital safety, as they can be used by malicious individuals to steal sensitive information such as passwords and credit card details. Understanding the potential risks and impacts of keyloggers is essential for safeguarding your data and protecting yourself from cybercrime. When a keylogger is installed on your device, it silently captures and records every keystroke you make. This includes your login credentials, personal messages, and other sensitive information you enter on your computer or smartphone. The captured data is then transmitted to the attacker, who can use it for various malicious purposes, such as identity theft or financial fraud. To prevent keyloggers from compromising your digital safety, it is crucial to implement effective protection measures. Here are some tips to help you protect your data from keyloggers: 1. Use Antivirus Software with Keylogger Protection A reliable antivirus software can detect and block keylogger threats, providing an additional layer of security for your device. Make sure to choose an antivirus program that has keylogger protection features to prevent unauthorized access to your sensitive information. 2. Employ Safe Browsing Practices Practice safe browsing habits to reduce the risk of encountering keyloggers. Avoid clicking on suspicious links or downloading files from untrusted sources. Be cautious when sharing personal information online and authenticate the websites you visit to ensure they are secure. 3. Regularly Update Your Operating System and Software Keeping your operating system and software up to date is vital for maintaining strong security against keyloggers. Updates often include security patches that address vulnerabilities, making it harder for attackers to exploit your device. 4. Implement Two-Factor Authentication Enable two-factor authentication (2FA) wherever possible to add an extra layer of security to your online accounts. This helps prevent unauthorized access even if your credentials are compromised. 5. Use Virtual Keyboards Using virtual keyboards can be an effective way to mitigate the risk of keyloggers. Virtual keyboards allow you to enter sensitive information by clicking on on-screen buttons, making it more difficult for keyloggers to capture your keystrokes. By taking these preventive measures, you can significantly reduce the risk of falling victim to keyloggers and protect your digital safety. Stay vigilant and stay informed to ensure the security of your personal and financial information. Methods to Safeguard Your Information from Keyloggers Protecting your information from keyloggers is crucial to maintaining your online security and privacy. By employing a combination of proactive measures, you can significantly reduce the risk of falling victim to keyloggers and keep your sensitive data secure. Here are some effective methods to safeguard your information: 1. Use Strong Passwords Creating strong, unique passwords for all your online accounts is a fundamental step in protecting yourself from keyloggers. Ensure that your passwords are a combination of uppercase and lowercase letters, numbers, and special characters. Avoid using easily guessable information, such as your name or birthdate, and consider using a password manager to generate and store complex passwords securely. 2. Implement Multi-Factor Authentication Enabling multi-factor authentication adds an extra layer of security to your accounts by requiring an additional verification step, such as a unique code sent to your phone or email. This helps prevent unauthorized access even if your password has been compromised by a keylogger. 3. Regularly Update Your Software Keeping your operating system, applications, and security software
